Feb 18, 2022 | Dishes, Meal Prep
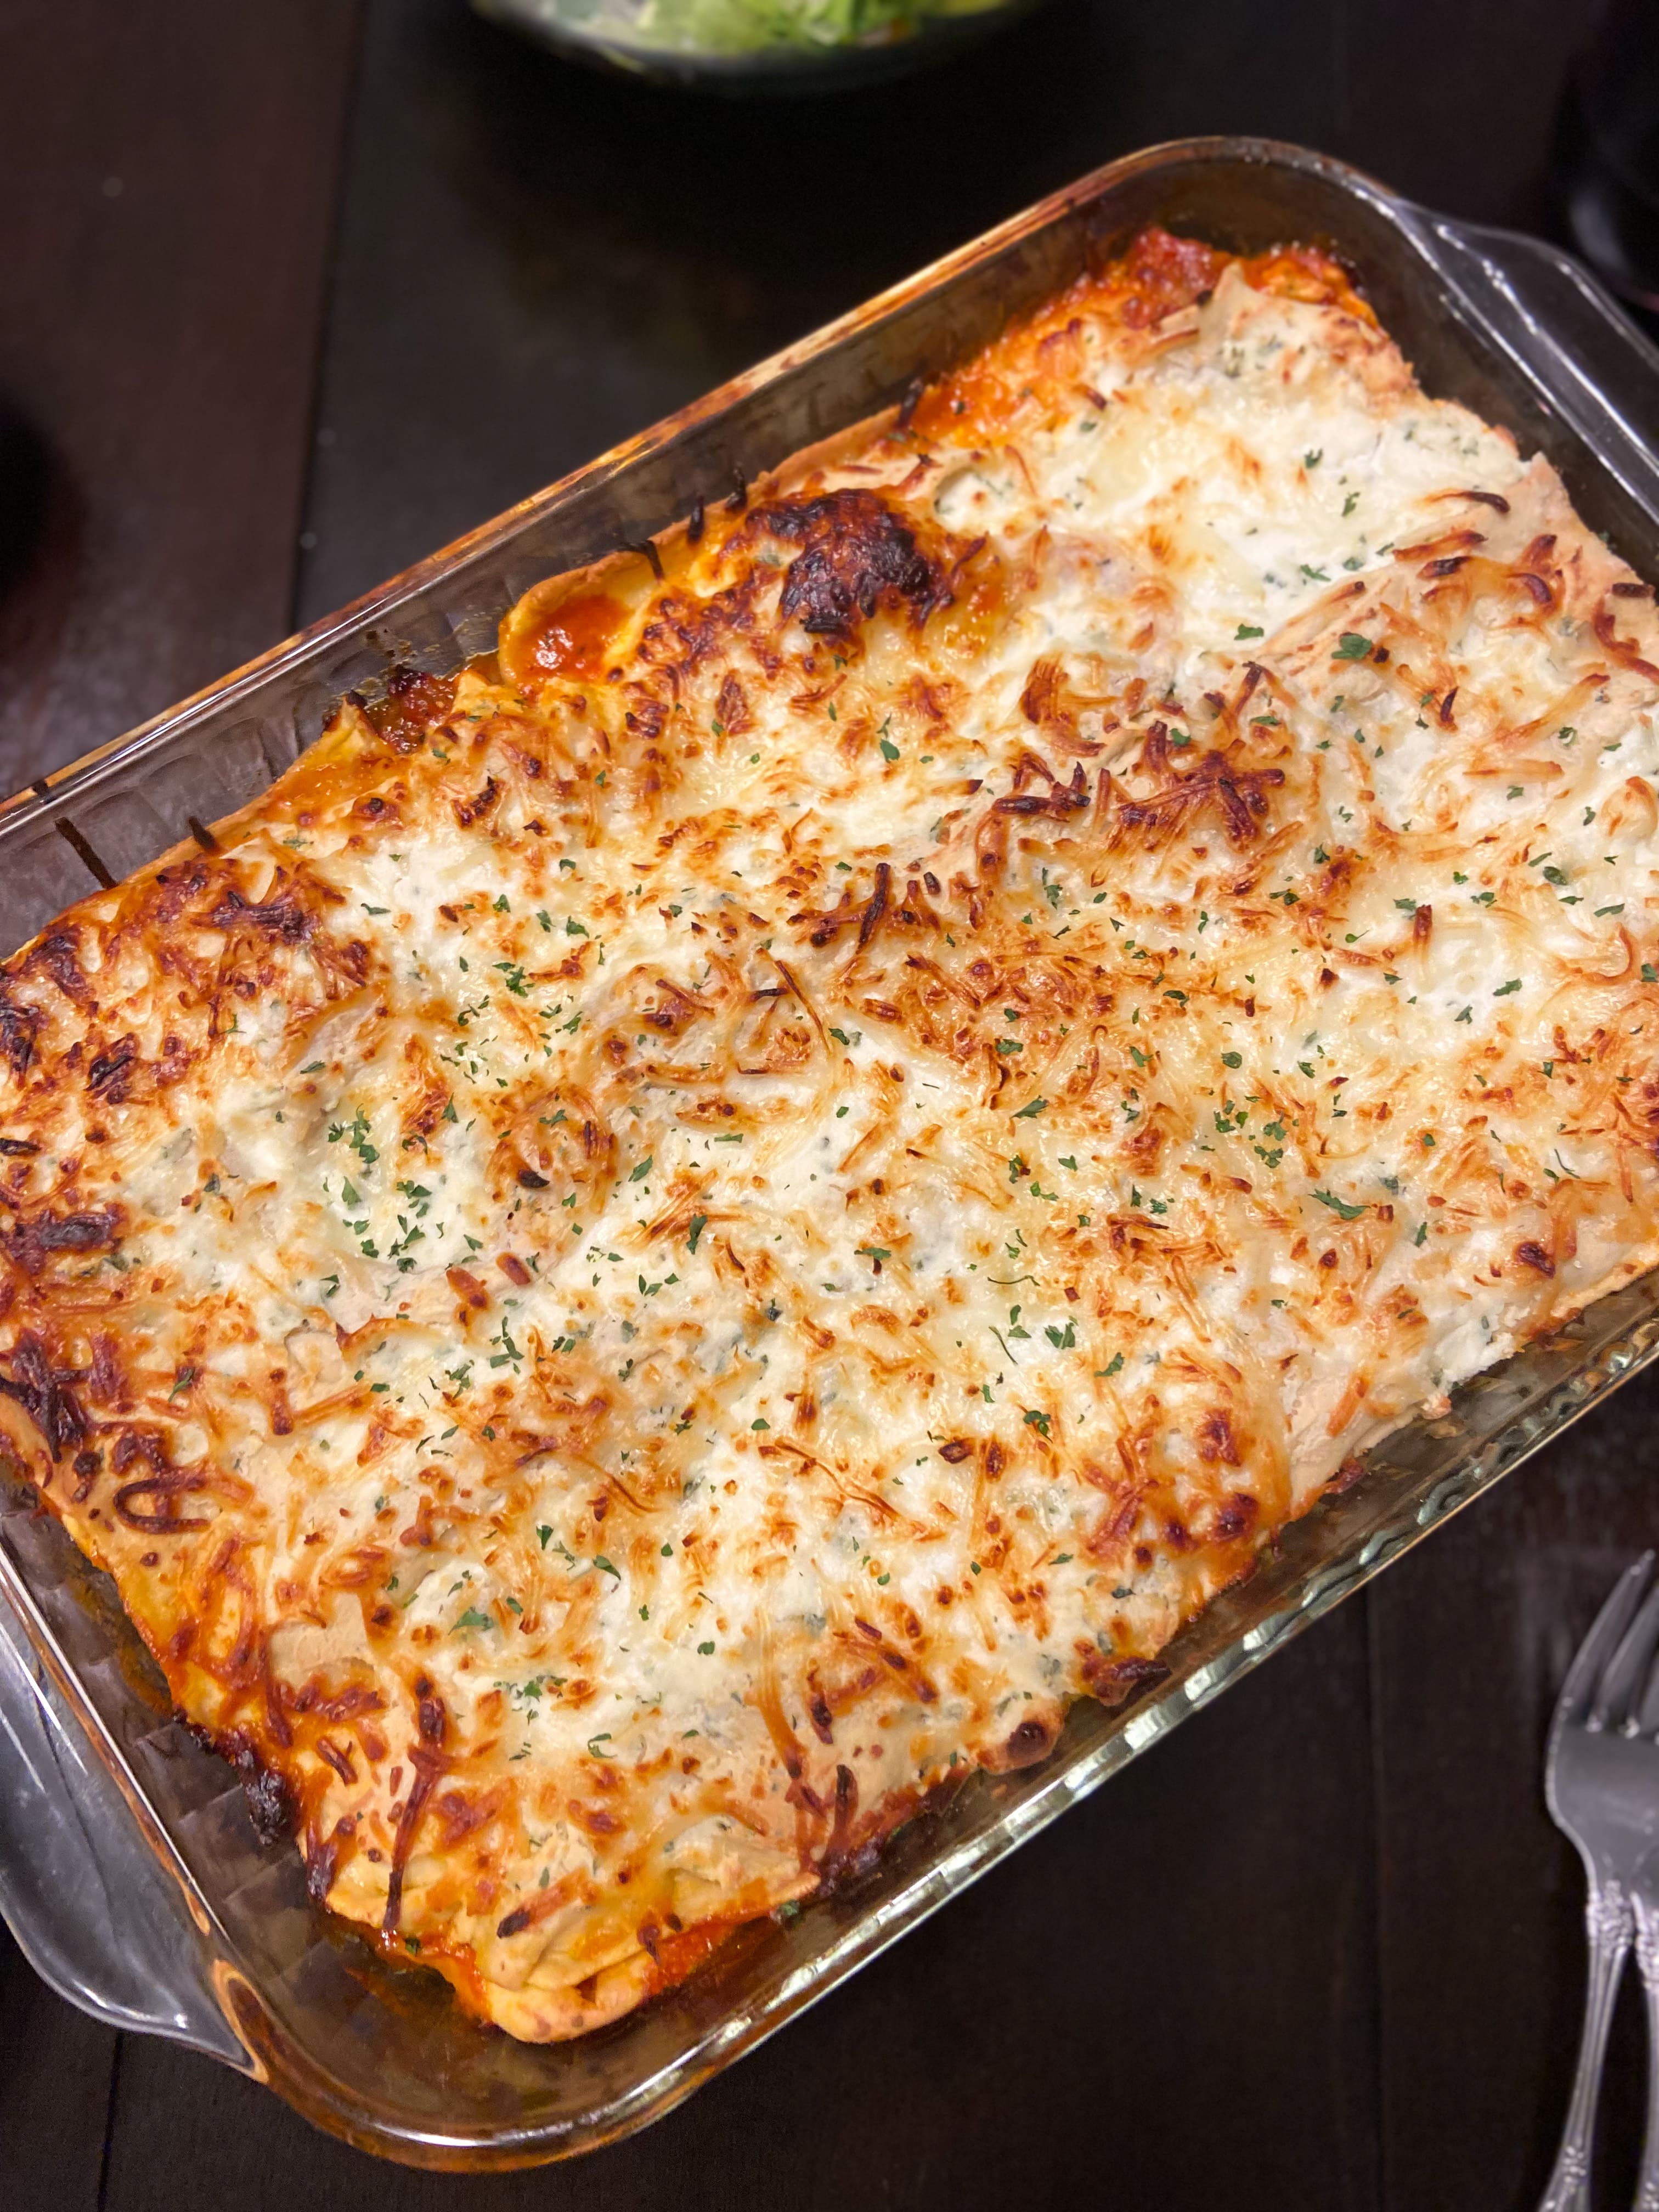
As a child, a homemade lasagna felt like a LUXURY, but it doesn’t have to be! This easy weeknight lasagna takes 30 minutes of prep and you can have a 5-star dinner. And for an extra bonus, you get lots of leftovers.
A classic meat sauce is the star element of this lasagna. However, the beef is optional if you would like to just have a tomato sauce base. Ground beef, onion, an array of spices, and crushed tomato simmers together to form a flavorful and hearty sauce.
Your cheese layer cannot be overlooked, and ricotta is essential. As a cottage cheese lover myself, I know that many people make their lasagna with that instead of ricotta. I am obsessed with how creamy and rich ricotta is, and personally feel that it can’t be left out. The cheese layer will consist of ricotta mixed with mozzarella and parsley.
For noodles, you can absolutely use boxed lasagna noodles. These should be cooked al dente, meaning they are still somewhat hard to bite into, instead of cooked fully through. As the lasagna bakes, they will soften, but baking fully cooked noodles will cause them to be soggy.
I am a huge fan of making my own pasta, which I understand is not always feasible. My mom and I took a cooking class at Dierburgs and learned to make it, and ever since I’ve been hooked. But boxed noodles work just as well, and make this a super simple dish.
The final touch to this lasagna is a layer of provolone cheese. The salty cheese on top of the thick layers of noodles, creamy cheese, and hearty sauce ties the whole dish together. It gets browned and bubbly and is SO good.
Serve this easy weeknight lasagna hot out of the oven with my hearty sweet kale salad on the side.
Save the leftovers in the fridge for up to 4 days, or freeze them for up to 2 months.
Easy Weeknight Lasagna
Homemade lasagna doesn't have to take forever! Make an incredible dinner any night of the week with this easy weeknight lasagna
Prep Time30 minutes mins
Cook Time30 minutes mins
Total Time1 hour hr
Course: Main Course
Cuisine: Italian
Keyword: easy weeknight dinner, lasagna
Servings: 8 servings
- 1 lb ground beef
- 1 onion, chopped
- 1 tbsp olive oil
- 2 28 oz can crushed tomatoes
- 2 tsp fennel
- 1 tbsp basil
- 1 tbsp oregano
- 1 tsp salt
- 2 tsp minced garlic
- 15 oz ricotta cheese
- 1 C mozzarella
- 6 slices provolone cheese
- 1 tsp parsley
- 16 oz lasagna noodles
Boil your lasagna noodles until they are al dente- they should be a little bit firm still. Drain and set aside
In a large pot, cook your ground beef and chopped onion in 1 tbsp of olive oil. Before the meat is fully browned, season it with fennel, basil, oregano, salt, and garlic. Add both cans of crushed tomatoes and bring to a simmer
In a small bowl, mix together the ricotta cheese, mozzarella, and parsley
Grease a 9x13 baking dish and ladle about a cup of meat sauce onto the bottom of the dish, or enough for it to be lightly covered. Layer noodles evenly across the top of the sauce and spread a layer of the ricotta cheese mixture. Repeat this process until there is no more meat sauce. Cover the top of the lasagna with provolone slices
Bake at 400 for 30 minutes, or until the top is golden and bubbly
Jan 15, 2022 | Brunch, Meal Prep
In the early mornings before work, a grab-n-go breakfast is key to starting the day off right. These sausage, cheddar and jalapeño egg bites are just the thing to stock your fridge with to give you energy right from the start.
Meal prep sometimes can make me think of bland, mass-produced, unexciting meals that we then are supposed to eat over and over. I am here to change that! I can’t stand to eat the same thing for more than a couple of days in a row, so if I’m going to make up a lot of one recipe, I want to be able to freeze it. Once a meal goes into the freezer, I can have it 2 days or 2 weeks from then, and I can count on it being good still.
The issue I have often run into with freezing breakfasts is that eggs get chalky or too wet when they’re reheated. These little egg bites are double-tested, and both times have passed the reheated test!
I’m not always hungry in the early morning, so if I’m going to eat, then I want a little bit to go a long way. These sausage, cheddar, and jalapeño egg bites have extra protein so you don’t have to eat a ton to prevent you from being starving 30 minutes later. We like to eat 2 and have a carb on the side, like some of my peanut butter chocolate chip overnight oats.
Adding just 1 cup of cottage cheese really adds some extra protein to the egg bites as well as creating a fluffier egg. The curds bake out and you 100% cannot tell that it’s in there. My favorite brand is Good Culture!
To start, fully cook a breakfast sausage of choice. I prefer to cook a whole pound and then freeze the second half so I can use it to make these even quicker the next batch. Make sure to drain any extra fat from the sausage.
Chop up red onion, a whole bell pepper (any color will work), and a jalapeño. After whisking together a dozen eggs into a large bowl, add in your chopped vegetables and cooked sausage. Stir in the cottage cheese, sharp cheddar cheese, and a few spices.
Fill up a greased muffin tin with about 1/4 C of egg mix in each cup. Bake at 350 for 30 minutes or until the egg is fully cooked through.
Once cooled, these egg bites can stay in the fridge for up to 5 days or in the freezer for 4 weeks!
Sausage, Cheddar & Jalapeño Egg Bites
These make-ahead egg bites are the perfect flavor-packed breakfast to go
Prep Time10 minutes mins
Cook Time30 minutes mins
Total Time40 minutes mins
Course: Breakfast
Cuisine: American
Keyword: breakast, egg bites, healthy breakfast
Servings: 18 egg bites
- 12 eggs
- 1/4 C red onion, chopped
- 1 bell pepper, chopped can be any color
- 1 jalapeño, minced
- 1/2 lb breakfast sausage, cooked and crumbled
- 1/2 C shredded sharp cheddar cheese
- 1 C cottage cheese
- 1 tsp garlic powder
- 1 tsp paprika
- 1 tsp pepper
Preheat the oven to 350
Cook the breakfast sausage completely and drain excess fat
In a large bowl, crack all 12 eggs and whisk so that they are well combined. Add in the chopped onions, bell pepper, jalapeño, cooked sausage, cheddar cheese, cottage cheese, and spices. Stir until the toppings are mixed well
Spray the muffin tin(s) with nonstick spray and fill with the egg mixture, about 1/4 Cup
Bake for 30 minutes or until the centers are cooked through completely
Dec 8, 2021 | Dishes, Meal Prep
There’s something about the idea of roasting a whole chicken to me that feels very old school and classic, yet is also very simple and elegant in a way. I think it has become a lost skill, as we now tend to cook in smaller amounts and not use the whole chicken. As someone who enjoys tackling new skills in the kitchen, I was very excited to take on making my first whole roasted herb chicken.
This chicken turned out as well as I could have hoped for, and it was much less difficult and time-consuming than I would have expected. And with each time making it, I think the process will go faster and be more successful each time.
I have gleaned ideas from many many people over the last year about the best way to make a chicken, and I think these combined tips are what made this a success. Samin Nosrat, the author of Salt Fat Acid Heat, explains that cooking a bird that is not at room temperature sets them up for unevenly cooking the meat. If the whole chicken is not at room temperature, the inside of the bird will not heat through at the same rate that the outer meat does. Therefore, it is important to set your chicken out 2-3 hours before you plan to cook it.
Also, I have seen many people, including my mother, cover the chicken with a butter-soaked cheesecloth to prevent it from drying out. This also helps create a barrier for the skin so that it doesn’t burn, especially the wings.
Roasting your chicken on a bed of vegetables and spices instead of a rack significantly increases the flavor throughout the meat. The juices from the chicken soak into the vegetables while the roasting vegetables also layer in flavor to the bird in the time that it is all roasting together. Additionally, you have an easy side to go along with your chicken with no extra work.
Lastly, your whole chicken carcass and leftover vegetable scraps can be used to make insanely nutrient-rich bone broth. Instead of throwing it all away, it is an incredibly easy way to use every bit of your food and create a flavorful base for meals in the future.
Now for actually making your whole roasted herb chicken-
To start, bring your bird to room temperature for 2-3 hours before you plan to roast it. While this is warming, you can prepare your vegetable and herbs
A cast-iron skillet, dutch oven, or any oven-safe dish that is at least several inches deep will work to roast the chicken in. Toss the vegetables in olive oil, salt, pepper, and place fresh rosemary and thyme on it.
To prepare the chicken, pat dry and stuff the cavity with onion, fresh herbs, and half a lemon. Create two pouches between the meat and the skin and place two herbed slabs of butter in between. Then create an herb rub of olive oil, garlic, and spices to rub into the whole chicken. After the legs are tied together and the chicken is placed on top of the vegetables, tuck the butter-soaked cheesecloth around the whole bird.
Cook the chicken at 400° F for 90 minutes. Using an instant-read thermometer check the temperature of the meat. The breast should be cooked to 170° and the thighs cooked to 180°. At 90 minutes, remove the cheesecloth. If the wings are looking significantly more browned than the rest of the bird, cover them with small pieces of tin foil for the remainder of the time. Let the bird sit for 15 minutes before cutting into it.
Whole Roasted Herb Chicken
A roasted whole chicken is easier than you think, and with a couple of helpful tips its can turn out beautifully every time!
Prep Time2 hours hrs
Cook Time1 hour hr 30 minutes mins
Total Time3 hours hrs 30 minutes mins
Course: Main Course
Cuisine: American
Keyword: roasted chicken, whole chicken
- 1 4-6lb chicken
- 5-6 potatoes, quartered any full sized variety will work
- 3 whole carrots, chopped into large pieces
- 3 stalks celery, chopped into large pieces
- 1 stick butter, divided
- 2/3 C olive oil, divided
- 3 cloves minced garlic
- 5-10 rosemary sprigs
- 2 tsp chopped or dried rosemary
- 2 tsp thyme
- 5-10 sage leaves
- salt and pepper
- 1/2 lemon
- 1 1/2 onions, quartered
In either a large cast-iron skillet or oven-safe baking dish, create a base with your poatoes, carrots, celery, and 1 onion. Drizzle about 1/3 C of olive oil over the top, and sprinkle salt and pepper as desired. Mix well and place half of your sage and rosemary on top
In a small bowl, mix about 1/3 C olive oil, salt and pepper, garlic, rosemary, and thyme. Set aside
Cut the stick of butter into thirds and set one third aside in a separate microwave-safe bowl
With the two remaining chunks of butter, mix in the remaining rosemary and thyme and flatten the two pieces of herbed butter
Pat your chicken dry and remove any innerds. Rub the olive oil and herb mixture over the whole bird. Fill the cavity with the remaining onion, lemon, sage leaves, and rosemary sprigs. Then gently create two pockets between the skin and the meat on the breast, just above the cavity. Slide an herbed butter slab into each cavity. Tie the chicken legs together with twine
Place the chicken on top of the vegetable in the pan. Melt your remaining butter until it is melted, and then dip your cheesecloth in until it is fully coated. Tuck this around your bird to prevent it from drying out
Bake at 400° F for at least 90 minutes, or until the breast is cooked to 180° and the thighs are 190°. At 90 minutes, remove the cheesecloth so that the skin can brown and crisp up. If the wings are looking significantly more browned, you can cover them with foil so that they dont burn
Nov 7, 2021 | Dishes, Meal Prep
Italian stuffed peppers are the epitome of easy, cozy, & savory dinners. My Grams always made stuffed peppers and as a child, I never did appreciate them. Now, they’ve earned a permanent spot in our winter dinner rotations.
Stuffed peppers are simple to make during the week, or an ideal dish to make for meal prep. They reheat so well and are so easily portable.
I will be fully transparent, that I just learned how to cook the best pepper though. Before, I could never figure out how to get the pepper cooked all the way without putting it in the oven for over an hour, and it still never seemed cooked through enough. Turns out, all you need to do is boil the peppers for just two minutes each before you fill them. Boom- a perfectly cooked, crisp-tender, bell pepper.
To create these mini-masterpieces, cook up your yellow onion and ground beef in a heavenly combination of Italian spices and lots of garlic. Mix in your rice of choice, cheese, and marinara sauce. I am partial to my essential Italian herb sauce, but if you have to go with store-bought, Classico is my go-to brand.
Boil your peppers, and fill ’em up. Top with extra cheese and bake them til they’re heated through and the cheese is bubbling on top.
These Italian stuffed peppers can be saved in the fridge for up to 5 days. Reheat for 2-3 minutes in the microwave.
Italian Stuffed Peppers
Quick, savory, hearty & healthy stuffed peppers make a perfect dinner or meal prep
Prep Time30 minutes mins
Cook Time15 minutes mins
Total Time45 minutes mins
Course: Main Course
Cuisine: American, Italian
Keyword: Italian stuffed pepper, stuffed pepper
Servings: 6 people
- 6 green peppers
- 1 lb ground beef
- 1 C cooked brown rice white rice or quinoa work too
- 24 oz marinara sauce
- 1 yellow onion, chopped
- salt & pepper
- 1 tbsp minced garlic
- 2 tsp oregano
- 2 tsp thyme
- 2 tsp basil
- 1/2 C shredded mozzarella (plus more to top)
In a large skillet, cook the onions and ground beef through completely. Season with salt and pepper, garlic, oregano, thyme, and basil. Once cooked, remove from the stove and set aside.
In a large pot, bring about 4 cups of water to a boil and preheat the oven to 350
Clean the peppers and cut the tops off, leaving an open and free-standing pepper. Once the water is boiling, drop half of the peppers in at a time, boiling for 2 minutes each. Remove from the boiling water and place into a lined baking dish
Combine the cooked ground beef and onions, cooked rice, marinara sauce, and 1/2 C of mozzarella and mix well. Fill each pepper to the desired amount, and top with cheese
Bake stuffed peppers for 15-20 minutes or until the cheese on top is browned and melted
There will most likely be extra meat filling for the peppers. You can fill more peppers and freeze them, or freeze just the filling, in an airtight container. These will stay good in the freezer for up to 3 months.
For meal prepping and saving these stuffed peppers, store them in the fridge in an airtight container for up to 5 days. Microwave for 2 minutes.
To reheat frozen filling: Defrost in the fridge overnight and heat up the next day.
To reheat frozen stuffed peppers: Defrost in the fridge overnight. Microwave for 2 minutes or Bake for 15 minutes at 350. Jun 18, 2021 | Dishes, Meal Prep
Italian zucchini boats are an easy dinner to the rescue that avoids both chicken and pasta. Both chicken and pasta can be made into fabulous recipes, but sometimes you just need a break! And if you’re like us, sometimes you just don’t know what to use ground beef for if you’re not making burgers or tacos. Don’t worry, we’ve got you!
Stuffed zucchinis are as easy as stuffed peppers, and require just as much work- which is not a lot. They cook easily and are easily reheated, which makes them perfect for meal prep for the week.
You can use ground turkey as well as beef for this recipe, or a meat substitute. I know meat usually comes sectioned by the pound, so feel free to either just use half or double the recipe if you want to just cook it all up at once. I originally made this with a full pound of beef, but it made way too much filling and I can’t get through 6 stuffed zucchini before they go bad.
As far as the marinara sauce, you can use your favorite brand, but if you’re interested in a homemade version check out my essential Italian herb pasta sauce. Add as much sauce to make the filling as saucy as you like.
Keep these Italian zucchini boats in the refrigerator for up to 4 days and enjoy!
For other veggie and flavor packed meal prep, check out my Italian veggie stew which is all time favorite.
Italian Zucchini Boats
Baked zucchini halves filled with Italian seasoned ground beef and quiona are low carb and high flavor
Prep Time15 minutes mins
Cook Time30 minutes mins
Total Time45 minutes mins
Course: Appetizer, Main Course
Cuisine: American, Italian
Keyword: healthy dinner, healthy meals, italian, low carb, zucchini boats
Servings: 4 people
- 3 zucchini, halved
- 1/2 lb ground beef
- 1/4 c quinoa
- 1/2 yellow onion, chopped
- 1-2 c marinara sauce
- 1 tsp basil
- 1 tsp oregano
- 1 tsp rosemary
- 1 tsp thyme
- t tsp ground fennel seed
- 1 tsp minced garlic
- salt and pepper to taste
- 1 tbsp olive oil
- 1 c Italian cheese of choice mozzarella, parmesan, blended cheese
Preheat the oven to 350. Cut the ends off of the zucchini and slice them in half, longways. Using a spoon, remove the seeds from each half. Lightly coat the inside half of the zucchini with olive oil. Bake for 15 minutes
Cook the quinona according to directions
In a skillet, add the chopped onion and ground beef, garlic, and spices. Cook until the beef is cooked through and drain any excess fat. Stir in the cooked quinoa, 1/2 C of cheese, and the marinara until it is as saucy as you like
Remove the zucchini from the oven and fill the cavities with the meat filling. Use the remaining cheese to sprinkle on top. Bake for another 15 minutes
Apr 20, 2021 | Brunch, Meal Prep
I’m a biiiiig breakfast gal, and I enjoy eating it at any time of the day. But when I’m on the go, I need something easy that also is going to keep me full for several hours. My ultimate go to- peanut butter chocolate chip overnight oats with a banana on top!
I started making overnight oats in college, and just never loved them, but they were easy to take to clinicals or eat in between classes. Turns out I was really just doing it all wrong because you can pack a lot of flavor into a small tupperware container!
Peanut butter chocolate chip is a true love of mine, evident with my similar but hot version of peanut butter chocolate loaded oats. And with a banana on top, it’s unbeatable. It’s easy to pack extra protein into my oats by adding protein powder and some chia seeds. I always always use Orgain plant protein, it’s clean and delicious and 100% not chalky tasting.
You can easily make up 3-4 servings of these oats at once because they save wonderfully in the fridge. I prefer to store them in a wide mouth tupperware container because it allows for maximum scooping. Usually, I will mix them up in their own containers and then pop the lid right on, but if yours doesn’t have enough room for a lot of stirring, just make them in a bowl and transfer it to whatever container you like.
These peanut butter chocolate chip overnight oats are like 1.5 steps- mix it all up, add bananas on top, and pop it in the fridge! And enjoy!
Peanut Butter Chocolate Chip Overnight Oats
Minimal ingredients with maximum flavor for this easy and filling on the go breakfast
Prep Time5 minutes mins
Total Time5 minutes mins
Course: Breakfast
Cuisine: American
Keyword: banana oats, chocolate peanut butter, easy breakfast, meal prep, overnight oats
Servings: 1 serving
- 1/2 C rolled oats
- 3/4 C milk of choice
- 1 tbsp peanut butter
- 1 pinch salt
- 1 tsp maple syrup
- 2 tbsp protein powder of choice I use vanilla Orgain
- 1 tsp chia seeds
- 1 tbsp mini chocolate chips
- 1/2 banana, sliced
Stir together the dry oats, almond milk, peanut butter, salt, maple syrup, protein powder, and chia seeds together until the peanut butter is well mixed in. Gently mix in chocolate chips
Transfer to an airtight container-tupperware or mason jar- and add sliced bananas on top. Store in the refrigerator overnight, or for up to 5 days.
Serve chilled or heated up. Add more milk if desired for a thinner consistency