Feb 9, 2022 | Baking
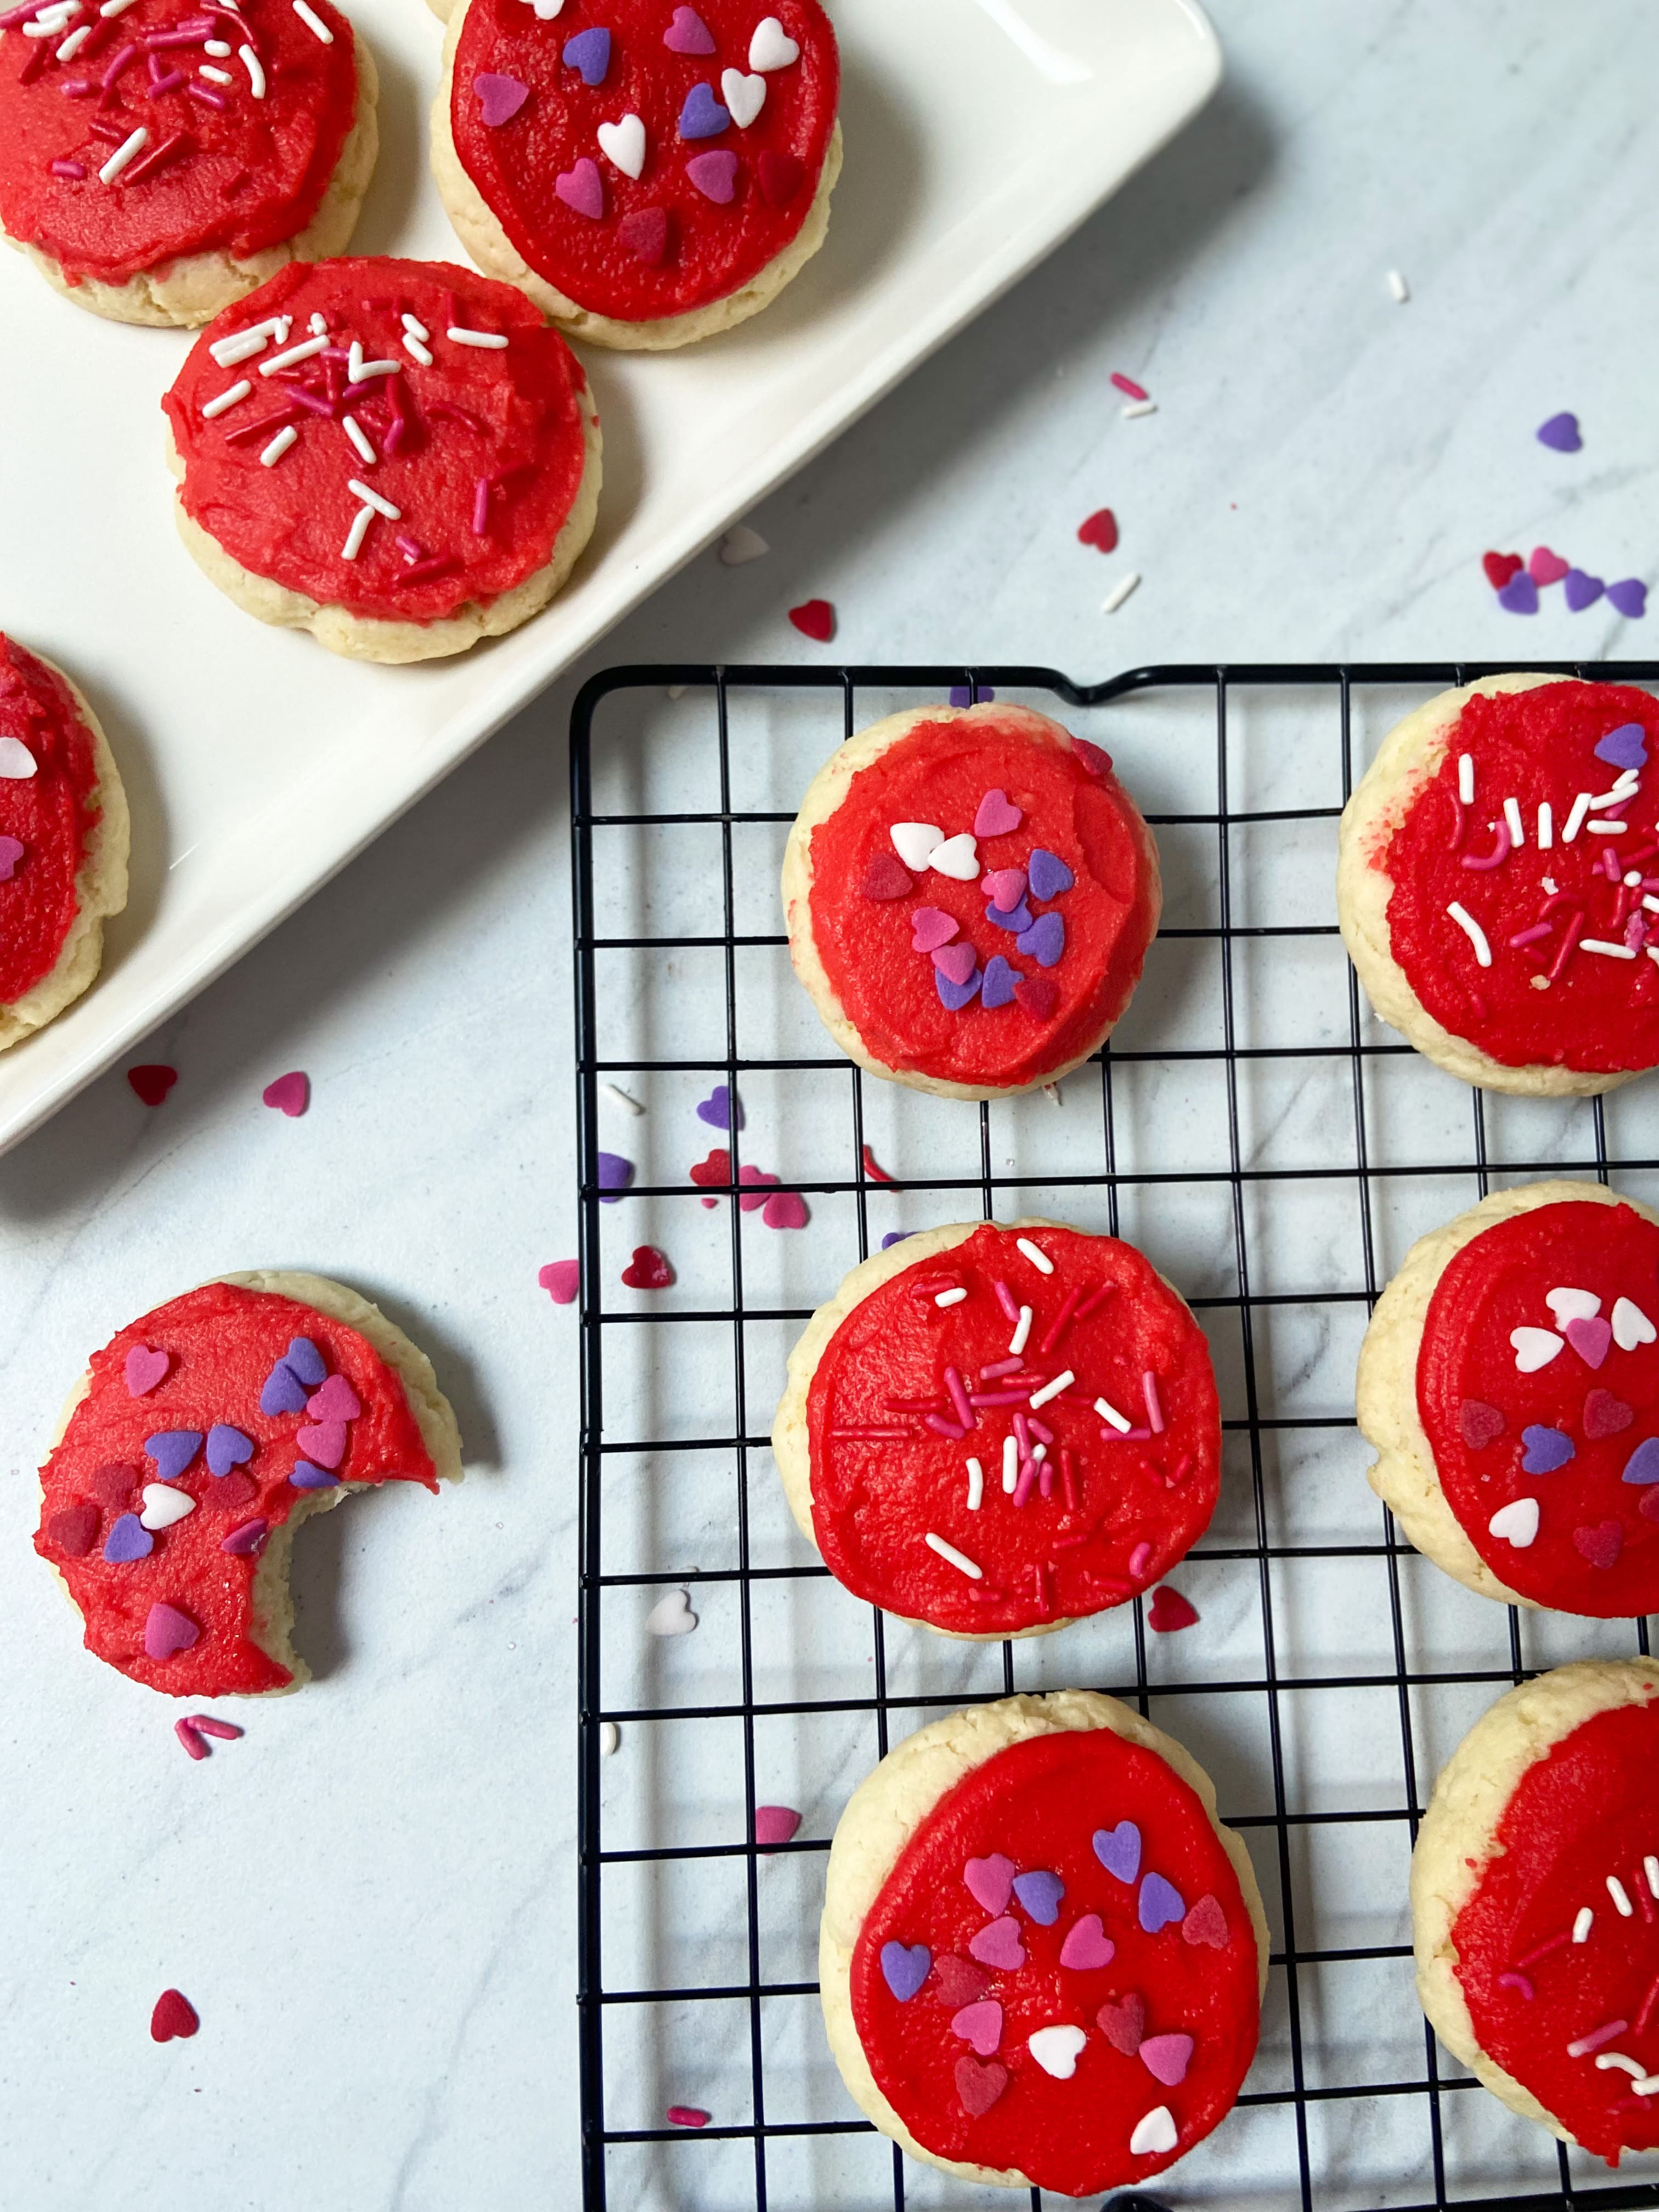
These no-roll Valentine’s Day sugar cookies are a homemade, and dare I say, better version of the traditional Lofthouse cookies. This recipe is universal to any holiday, just switch out your frosting color and seasonal sprinkles!
No holiday potluck would feel complete without that container of thickly frosted festive Lofthouse cookies, right? But this year I got to thinking that I could definitely make these bad boys myself. They were easier than I thought, and I am so happy with how they turned out.
Usually, I steer away from making sugar cookies because I am wholly uninterested in rolling out cookie dough and cutting them into shapes. I’m all for going all out in the kitchen, but for whatever reason rolling out dough is where I draw the line. But have no fear, these are simple and take very little effort to get a perfect shape every time!
This particular cookie dough is thick and cakey. The secret? Using cake flour, sour cream, and cream of tartar. The cake flour and sour cream give these cookies a more dense, filling kind of texture than your standard cookie, while the cream of tartar helps to level it out by keeping it fluffy at the same time. Cake flour is easily found at most grocery stores, and Swan Downs is the gold standard.
Once your dough is made, it will be really sticky. Waiting for cookie dough to chill is annoying, but is definitely a necessary step for these cookies. About 10 minutes in the freezer is all the time needed to chill the dough and is just the right amount of time to get frosting made.
I made a classic buttercream, in Valentine’s Day red, and it is the perfect topping for these cookies. AmeriColor is my favorite brand of gel coloring- it is affordable and so easy to use. I also found heart-shaped sprinkles at Walmart, which oddly enough is always where I find the best selection of baking supplies.
After trying a couple of different techniques, I found that rolling the dough balls between my hands to make them smooth and then lightly pressing the tops down with the bottom of a glass cup gave me the perfect round cookie. They don’t change shape a whole lot while they bake, so they need to go into the oven smooth and symmetrical.
These cookies need between 8 and 10 minutes to bake at 400° F. They should be the faintest shade of gold on the bottom edges, but will be soft to the touch. Let them set for about 10 minutes before transferring them off the baking sheet, and let them cool completely before frosting them.
Load these no-roll Valentine’s Day sugar cookies with your homemade buttercream and decorate with sprinkles while the frosting is still wet.
Check out my other absolute favorite, gooey s’mores cookies, here!
No Roll Valentine’s Day Sugar Cookies
A Lofthouse cookie for Valentine's Day, but easily made at home!
Prep Time20 minutes mins
Cook Time9 minutes mins
Total Time30 minutes mins
Course: Dessert
Cuisine: American
Keyword: Lofthouse cookie, sugar cookie, Valentine’s Day, Valentine’s Day cookies
Servings: 2 Dozen
Sugar Cookies
- 1/2 C unsalted butter softened
- 1/2 C sour cream
- 1 egg
- 1 C sugar
- 1 tsp vanilla
- 1/2 tsp almond extract
- 3 C cake flour
- 1 tsp baking soda
- 1 tsp cream of tartar
- 1/2 tsp salt
Buttercream Frosting
- 1/2 C unsalted butter
- 3 C powdered sugar
- 1 tsp vanilla
- pinch salt
- 4-6 tsp milk add one at a time until you get the frosting to a consistency you like
- food coloring
- holiday or festive sprinkles
Sugar Cookies
In a stand mixer or with a hand mixer, cream the butter until it is completely smooth. Add the sour cream and sugar, and mix until there are no clumps. Beat in the egg, vanilla, and almond extract
In a separate bowl, mix the cake flour, baking soda, baking powder, cream of tartar, and salt
Slowly add a little of the dry mixture to the wet at a time and mix, ensuring it is fully encorporated. The dough should be thick and sticky. Place the mixing bowl of dough in the fridge for 10-15 minutes
Preheat the oven to 400° F and prepare a baking sheet with parchment paper or silicone baking mats
Scoop out the cookie dough in about 1 tbsp balls. Roll them gently between your hands to create smooth round balls. Once they are lined up on a baking sheet, gently press the tops of them flat with the bottom of a glass cup
Bake for 9 minutes. They should be soft to the touch but after 5-10 minutes will set to the appropriate texture. Cool cookies completely before frosting them
Buttercream Frosting
In a stand mixer or with a handheld mixer, beat the butter until it is completely smooth with no lumps. Add 1 C of powdered sugar, vanilla, and 1 tsp of milk. Mix until the powdered sugar is smooth
Continue adding 1 C of powdered sugar and 1 tsp of milk and then mixing until you've incorporated all of the powdered sugar. Add 1 tsp of milk at a time until you've reached a desired consistency for the frosting
Add 2-3 drops of food coloring to the desired amount of frosting and mix until the color is no longer streaky
Frost the cooled sugar cookies and top with festive sprinkles while the icing is still wet
Dec 9, 2021 | Baking, Dishes
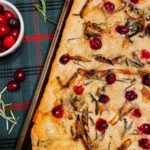
Bread that is both beautiful and delicious is also easier than you think. This holiday focaccia bread is so simple and customizable to create a stunning piece for your festive table.
Focaccia bread is so incredibly delicious, but I had no idea how easy it was to make as well. There’s a small amount of time spent mixing the ingredients, and then it needs about two hours to rise. Once your dough has risen, it gets heavily coated in olive oil and you get to start the fun stuff.
Dimpling the dough with your fingers is so satisfying, but also is necessary to create the little pockets for your toppings to rest in. Adequately oil your rimmed baking sheet and spread out the dough to reach all the corners. Drizzle some more olive oil on top and lightly press your fingertips all over the bread, creating a surface covered in dimples.
The base of this recipe, the dough itself, can be used in combination with any toppings. Flowers made from vegetables, random patterns of delicious toppings, or just cheese are all popular options.
However, for this holiday concoction, I used caramelized onions, cranberries, brie, and fresh rosemary and sage. When I think about a classic holiday combination, cranberry and rosemary immediately come to mind. And brie, because obviously, cheese makes everything better.
I used fresh cranberries, but they were more tart than I was anticipating. You could very easily substitute craisins to create a sweeter bread.
I scattered the toppings all across the bread, but if you’re feeling extra festive you can easily form a wreath or tree with the toppings.
While baking, I do love a good holiday drink to sip on. I paired this with my festive cranberry mule, and the cranberry/rosemary pairings in both make them very complimentary of each other.
Holiday Focaccia Bread
Savory herb focaccia bread topped with caramelized onions, brie, cranberry, and fresh herbs
Prep Time2 hours hrs
Cook Time20 minutes mins
Total Time2 hours hrs 30 minutes mins
Course: Appetizer, Side Dish
Keyword: cranberry and rosemary, focaccia, focaccia bread, holiday focaccia, holiday recipes
Focaccia
- 1 1/2 C warm water
- 2 1/4 tsp active yeast one standard .25 oz package
- 4 1/2 C flour can substitute 1:1 GF flour
- 1 1/2 tsp salt
- 1/4 C olive oil plus extra for the pan
- 1 tsp minced garlic
- 1 tsp rosemary
- 1 tsp thyme
Toppings
- 1 medium onion, sliced
- 1 tbsp butter
- 1/2 C cranberries or craisins fresh cranberries will be tart, craisins will be sweeter
- 1 block brie, cubed
- fresh rosemary sprigs
- fresh sage
- salt and pepper
Before class
In a large mixing bowl or stand mixer with a dough hook, mix the yeast and warm water together and let it rest for 5-10 minutes. Then add the flour, salt, olive oil, garlic, rosemary, and thyme. Mix until the flour is completely combined and the dough springs back slightly if press on it. Add more flour (up to 1/2 C) if needed so that the dough is workable and not completely sticky. Cover with a clean towel and set aside for 1-2 hours.
Making the Bread
Preheat the oven to 425
In a small skillet, add your butter and sliced onions and cook on low to medium heat until the onions start to turn a golden brown
Lightly grease a rimmed baking sheet with olive oil, and spread out the dough all the way to the corners. Spread more olive oil on top and using your fingers, dimple the dough so that there are little pockets for the toppings to rest in
Top the focaccia with the caramelized onions, cubed brie, cranberries, rosemary, and chopped sage
Bake for 15-20 minutes
Nov 30, 2021 | Baking, Drinks & Cocktails
Hot chocolate bombs have been *blowing up* in popularity this year. It’s like regular hot chocolate, but cooler, and filled with more marshmallows and toppings.
Turns out, you can make these yourself at home with relatively few ingredients and materials, and it’s a fun project to do as a family or in a group. These easy homemade hot chocolate bombs are perfectly customizable and possible to do in relatively little time. You can make them with kids that are home on break, give them as gifts, or make them for guests that might be visiting. Or make them for yourself to enjoy! Hot chocolate and a Christmas movie? Yes, please.
To start, you just need some kind of sphere to create your mold. Personally, I used a lemon. You’re going to take two sheets of tin foil and tightly mold it around your object to create two even (ish) halves of a mold. Fold the edges of the foil flat so that there is a clear edge for you to form with the chocolate.
Melt chocolate chips and using a brush, a spoon, or your finger, evenly cover the inside of both halves of your mold. Pop them into the freezer for just a few minutes, and then do a second coat of chocolate. It’s very important to coat the edges well so that when you pull the tin foil away, you don’t crack the molds. If this happens, patch it with more melted chocolate.
Once the second coat of chocolate has set, gently peel the foil away from your molds. With two halves of a mold, the hard part is done! Fill one half with hot chocolate, marshmallows, and any other treats you’d like. Using a small ziplock bag, fill a corner with the remaining melted chocolate and cut a small hole in the end. Use this to pipe chocolate between the two halves of the mold to seal them up.
Decorate the top of your easy hot chocolate bomb with more melted chocolate, sprinkles, candy canes, or any other sweets. When ready to enjoy it, just heat milk up for 2 minutes in the microwave and drop the bomb in and watch it melt!
Optional to add liquor of choice into the hot chocolate once its made 🙂
For an extra festive evening, make a boozy holiday drink to make while you work on these! I love mixing Skrewball peanut butter whiskey with dairy-free eggnog, and sipping on that while baking, decorating, or wrapping. Check out my recipe for it here!
Easy Homemade Hot Chocolate Bombs
Prep Time3 minutes mins
Total Time30 minutes mins
Course: Dessert, Drinks
Cuisine: American
Keyword: holiday treats, hot chocolate, hot chocolate bombs
Servings: 5
- 2 C chocolate chips I used semi-sweet but milk chocolate will work too
- 1/2 C hot chocolate mix
- mini marshmallows
- toppings- sprinkles, caramel, candy canes, white chocolate, Oreos, etc
Start by obtaining a sphere that you can mold your hot chocolate bombs to. Ideally, it should be as large as a lime, but small enough that it fits in a standard mug. I used a Christmas ornament for my mold. If your object is not clean, or can't be washed, wrap it tightly in saran wrap first
To make your mold, take two sheets of tin foil and fold them in half. Use both sheets to form around the object tightly, creating two half spheres. Fold back the extra foil so that you have a clean line to form the edges.
In a microwave-safe mixing bowl, add 1 C of chocolate and microwave in 20-second intervals, mixing each time, until the chocolate is melted but not too hot
Paint the chocolate into both halves of the mold, ensuring that it covers the foil evenly. Place the molds into the freezer for 5-10 minutes and then paint a second coat of chocolate onto the edges and anywhere that seems thin. Freeze for another 5-10 minutes
Gently peel the foil off of the chocolate to remove the mold. If the chocolate starts cracking, paint more on to the affected areas and re-freeze
Once you have two chocolate halves, fill one half with 1-2 tbsp of hot chocolate mix, mini marshmallows, and any other toppings you desire
If needed, heat up the second cup of chocolate the same as before. Scoop the melted chocolate into the corner of a small ziplock bag and snip a very small hole in the corner of it
Set your empty half shell on top of your filled shell, and use the "piping bag" of chocolate to attach the two halves. Use your paintbrush as needed to smooth out or fill any gaps. Place back into the freezer for another 5-10 minutes
Once your chocolate bomb is formed, use the remaining bag of chocolate to drizzle on top, and decorate with any sprinkles, crushed candy canes, caramel, or toppings desired.
Keep these hot chocolate bombs separate from each other and safe from the heat of your hands by storing them each in their own cupcake liner
When ready to use, heat a mug of milk in the microwave for 2 minutes and drop your hot chocolate bomb in. Stir as necessary
Mar 31, 2021 | Baking, Brunch, Meal Prep
Chocolate with chocolate chips for breakfast? Say no more! These double chocolate blender muffins are a dream to whip up and the perfect on the go breakfast or snack.
I’ve made several variations of these for years, and every time I remember to make them I’m blown away at how easy they are. You literally dump all of the ingredients into a blender and you immediately have a batter. Boom, you’ve got batter and after 10 minutes in the oven and you’ve got a whole bunch of muffins.
These muffins are grain-free and have no extra sugars. The base of the batter comes from oatmeal and a ripe banana, and with the help of some leavening agents, some greek yogurt, and an egg, you’ve got a muffin! I add a little honey or maple syrup to sweeten them, but that is *technically* optional.
To give these muffins a little more bang for their buck, I add in a little protein powder too. I’m a huge fan of Orgain and their protein powder. It’s plant-based and doesn’t taste chalky, so win-win. I used their chocolate peanut butter cup in this recipe.
There will be enough batter to make 6-9 muffins, depending on how full you fill your tins. I often double the recipe when I make them, because you can never have enough muffins. Store these double chocolate blender muffins in a sealed container in the fridge for up to 10 days, or in the freezer for up to 3 months.
For another banana and chocolate chip power combo, check out my very favorite chocolate chip banana bread!
Double Chocolate Blender Muffins
These decilious double chocolate muffins are ready in 15 minutes and made with no added sugar
Prep Time5 minutes mins
Cook Time10 minutes mins
Total Time15 minutes mins
Course: Breakfast, Snack
Cuisine: American
Keyword: blender muffins, breakfast muffins, chocolate chip, double chocolate, double chocolate muffins, meal prep
Servings: 9 muffins
- 1 ripe banana
- 1 C oats
- 1 egg
- 1/4 C greek yogurt
- 1/2 tsp baking soda
- 1 tsp baking powder
- 1 tbsp honey or maple syrup
- 1/4 C chocolate protein powder I use Orgain
- 2 tsp cocoa powder
- 1/2 C mini chocolate chips
Preheat the oven to 400
Add all ingredients except for the chocolate chips to a food processor or blender. Blend on high until a smooth batter is formed. Fold in chocolate chips
Spoon batter into well-greased muffin tins. There is enough batter for 6-9 muffins depending on how full you fill them
Bake for 10 minutes or until a toothpick comes out clean
I usually double my batter to create to keep more muffins on hand, to eat now or freeze for later.
Mar 1, 2021 | Baking
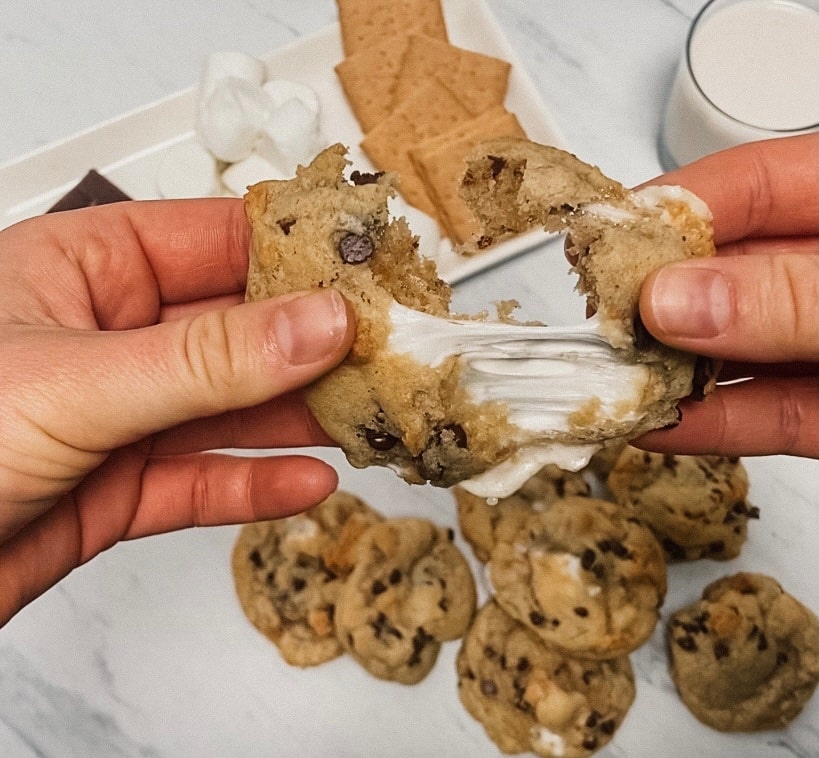
I have been on SUCH a s’more kick for absolutely no reason at all, and that’s perfectly okay with me. Since making a campfire s’mores isn’t an option every day, unfortunately, making these gooey s’mores cookies is going to have to be my next best option. And not to toot my own horn, but they’re GOOD.
These cookies are perfectly balanced between being sweet with a touch of salty. The marshmallows are so gooey add the perfect touch to these babies. Seriously, they’re a game changer.
Cookies are so much fun because you can make them any theme you want. You like a certain dessert? Make it into a cookie. Boom, a handheld version of any little dessert you can think of. And since a traditional s’more is not as easily obtained, a s’mores cookie is the perfect alternative.
This cookie dough does need to be chilled for about 30 minutes prior to baking, so I just pop the dough into the freezer while I preheat the oven and get the kitchen cleaned up.
Gooey S’mores Cookies
A campfire s'mores but in the convenience of a cookie and made anytime you like!
Prep Time15 minutes mins
Cook Time13 minutes mins
Freeze Time30 minutes mins
Total Time1 hour hr
Course: Dessert
Cuisine: American
Keyword: cookies, dessert, s’mores, s’mores cookies
Servings: 18 cookies
- 1 1/2 c flour
- 1 tsp salt
- 1/2 tsp baking soda
- 1/2 c sugar
- 1/4 c brown sugar
- 1/2 c butter melted
- 1 egg
- 1/2 tsp vanilla
- 1/2 c mini chocolate chips
- 1/2 c graham crackers in dime to quarter sized pieces
- 1/2 c marshmallows mini or just pull apart/cut large marshmallows
Mix melted butter with regular sugar, brown sugar, egg, and vanilla. In a separate bowl combine the flour, baking soda, and salt. Add the dry ingredients to the wet and combine
Fold in the chocolate chips, marshmallows, and graham cracker pieces
Scoop out the cookies and place them on a baking sheet to chill for 30 minutes
Preheat the oven to 350
Space the chilled cookies out appropriately on parchment paper or a silicone baking sheet and bake for 13 minutes
The cookie dough can be put in the freezer for 30 minutes but no longer or the cookies will be too cold to bake immediately. In the refrigerator, they can rest as long as overnight. I recommend scooping out the cookies into balls before chilling them since it will be more difficult to scoop them out after the dough is chilled and working with it will make it softer, counteracting the chilling time.
I scoop the dough with a tablespoon and it makes 18 cookies. Store these gooey s’mores cookies in a sealed container for up to a week, if they make it that long! You can also put a piece of bread in the container with them to help keep them fresh. The bread gets hard and the cookies stay soft. Don’t ask me how, it’s just magic I think. Or read about it here.
If you’re looking for another sweet treat to keep on hand, try my “Reese’s” Dates, I’m obsessed!
Dec 26, 2020 | Baking
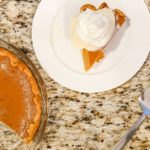
Truthfully, I never thought I was a pumpkin pie person until my mom recently showed me an old family recipe and now, this classic pumpkin pie my eyes have been opened. This classic pumpkin pie knocks all the others right out of the park. Also, so does my Gram’s famous pecan pie.
While I think I will still pass up any version of a store bought pumpkin pie, I will absolutely be making this recipe for years to come. It isn’t too custardy or watery and jiggly, but it also isn’t too solid or dry. Basically the perfect middle ground of sweet but not overbearing, and creamy but not too loose. I think we’ll call this one a win.
Obviously, I prefer a homemade crust when I’m making a pie. I have always loved America’s Test Kitchen and their recipes are always 10/10, and their pie dough is no exception. However, I’ve used store bought many a time and it works just as well, so don’t sweat it.
Classic Pumpkin Pie
The perfect classic pumpkin pie for any table!
Prep Time10 minutes mins
Cook Time45 minutes mins
Course: Dessert
Cuisine: American
Keyword: baking, dessert, pie, pumpkin pie, thanksgiving, thanksgiving desserts
- 1 1/4 c pumpkin NOT pumpkin pie filling
- 3/4 c sugar
- 1/2 tsp salt
- 1 tsp pumpkin pie seasoning
- 1 tsp flour
- 2 eggs whisked
- 1 c evaporated milk
- 1/2 tsp vanilla
- 1 9" pie shell
Preheat the oven to 400
In a large bowl, combine pumpkin, sugar, salt, spices, and flour. Mix in eggs, evaporated milk, and vanilla
Use cooking spray or butter to grease a 9" pie plate and roll out pie crust into it. Fill pie crust with filling
Bake for 40 minutes, adding a foil collar around the edge of the crust at 20 minutes
When baking pies, bake on a middle rack in the oven. Set a baking rack below it and center a baking tray underneath the pie plate. This prevents any possible overflow from burning on the bottom of your oven.
To create a collar on the pie crust, lightly cover just the edge of the pie dish with tin foil to prevent the crust from burning while the filling is cooking. This can be done at the start of baking or halfway through. This pie can be covered and stored at room temperature for up to 3 days or in the refrigerator for up to 5.