Chocolate with chocolate chips for breakfast? Say no more! These double chocolate blender muffins are a dream to whip up and the perfect on the go breakfast or snack.
I’ve made several variations of these for years, and every time I remember to make them I’m blown away at how easy they are. You literally dump all of the ingredients into a blender and you immediately have a batter. Boom, you’ve got batter and after 10 minutes in the oven and you’ve got a whole bunch of muffins.
These muffins are grain-free and have no extra sugars. The base of the batter comes from oatmeal and a ripe banana, and with the help of some leavening agents, some greek yogurt, and an egg, you’ve got a muffin! I add a little honey or maple syrup to sweeten them, but that is *technically* optional.
To give these muffins a little more bang for their buck, I add in a little protein powder too. I’m a huge fan of Orgain and their protein powder. It’s plant-based and doesn’t taste chalky, so win-win. I used their chocolate peanut butter cup in this recipe.
There will be enough batter to make 6-9 muffins, depending on how full you fill your tins. I often double the recipe when I make them, because you can never have enough muffins. Store these double chocolate blender muffins in a sealed container in the fridge for up to 10 days, or in the freezer for up to 3 months.
Add all ingredients except for the chocolate chips to a food processor or blender. Blend on high until a smooth batter is formed. Fold in chocolate chips
Spoon batter into well-greased muffin tins. There is enough batter for 6-9 muffins depending on how full you fill them
Bake for 10 minutes or until a toothpick comes out clean
Notes
I usually double my batter to create to keep more muffins on hand, to eat now or freeze for later.
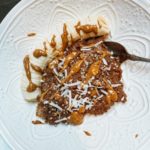
I think breakfast is a far superior meal, and love to make a good one every day. But I also need it to be filling and stick with me for the day. Loaded oats are the way to go for an easy and filling breakfast, and these chocolate peanut butter loaded oats are at the top of my list.
Stovetop oats are endlessly versatile. You can put literally anything you have on hand in them and create something fabulous each time. Nuts, berries, frozen fruits, nut butter, protein powders, chocolate chips, or jam. The combinations never end. But I think above all else, the chocolate peanut butter combo is perfect over and over again.
I add protein powder to my oats, and really love using Orgain. I don’t love whey and am not at all a fan of the taste, but found this plant protein at Costco and have been hooked ever since. For this recipe, I use the chocolate peanut butter cup kind, but I keep the vanilla on hand always. Also, the Kirkland mixed nut butter, don’t walk but RUN to get yourself some.
1 servingchocolate peanut butter cup protein powderOrgain
almond milkto get desired consistency
2 tspchia seeds
shredded coconut
1banana
mixed nut butter
cocoa nibs
hemp seeds
Instructions
Cook the oats according to directions on packaging
Add in protein powder and mix in milk of choice to get the consistency desired
Top with any toppings desired and drizzle with a nut butter of choice
These chocolate peanut butter loaded oats are so easy it hardly even feels like I can call it a recipe, but it’s so worth it. My other latest breakfast kick has been my green smoothie bowls which are also VE/VG friendly too!
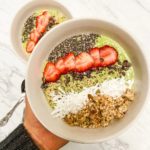
I am a huge breakfast person, and sometimes you need a new way to get your fuel packed breakfast in. This protein-packed green smoothie bowl is the perfect way to fuel your day!
I don’t know if anyone else’s mom told them that breakfast didn’t count if they didn’t have protein, but mine certainly did. No breakfast of just cereal for us, we always had to have an egg or something with it. I to this day still have trouble finding a satisfying breakfast that doesn’t have an egg.
The secret ingredient to this protein-packed breakfast without an egg? Tofu. Eep! I know, it’s so strange, but hang with me here.
Tofu has no flavor on its own, so it takes on whatever flavor it put in. Blended up in a smoothie it has absolutely NO FLAVOR. Like you can’t even tell its in there, I promise. I even served it to my boyfriend and until he reads this, he won’t know it was even in there 🙂
Not only does tofu have no flavor, but it also takes on any form you want it to. So blended up, it only thickens the smoothie. This means you need less frozen fruit, and therefore, less sugar is added to it. And to top it off, it’s PACKED with protein. Win, win, win.
An easy smoothie bowl packed full of greens and protein to fuel your day
Prep Time10 minutesmins
Total Time10 minutesmins
Course: Breakfast
Cuisine: American
Keyword: breakfast, easy breakfast, green smoothie, smoothie bowl
Servings: 2people
Equipment
food processor or blender
Ingredients
Smoothie bowl
1/2 bananafrozen
1/4cfrozen tropical fruitmango, pineapple, peaches, or strawberries
1 cspinach
4oztofu1/4 of a standard 1 lb block
1/4-1/2calmond milk
1 servingvanilla protien powder of choiceI use vanilla Orgain
ice
Toppings
sliced strawberries
shredded coconut flakes
chia seeds
hemp seeds
fresh fruit of choice
granola
Instructions
In a food processor or blender, add the frozen fruit, spinach, tofu, protein powder, and start with 1/4 cup of almond milk. Blend on high for 1-2 minutes
Scrape the sides down and add splashes of almond milk as needed to create a thick but creamy texture. Blend for another 1-2 minutes until everuthing is combided. Add ice if necessary
Scrape down and serve in a bowl with all of your favorite toppings
Serve this smoothie bowl icy cold with all your favorite toppings. I find all of my favorites at Trader Joes. Their cocoa nibs, hemp seeds, granola, and shredded coconut flakes are among my favorites. Any fresh fruit, nuts, seeds, or honey also makes for perfect toppings.
If you would rather drink your smoothie without the fluff of toppings, just make my tropical green smoothie instead!
Needing a quick and delicious breakfast ready in minutes? Then these easy prep breakfast sandwiches are just the thing you need in your life.
Bacon, egg, and cheese on an everything bagel is a no fuss breakfast dream. Make these breakfast sandwiches up once and have 8 breakfasts that can be heated and ready to eat in 3 minutes.
This could not be more simple to get some breakfasts prepared for a couple weeks. I made an egg bake and pan of bacon and threw both into the oven, let them cool, and divided them up. Boom, it really is that easy.
1packagebagels of choice full bagels or bagel thins, I used everything bagels
sliced cheese of choicepepper jack, colby jack, or cheddar work well
Instructions
Preheat the oven to 350
In a large bowl crack all of the eggs and whisk well to combine. Add the peppers, onion, spinach, and seasoning. Pour into one baking pan, lined with tin foil and sprayed with non stick spray
Line a baking tray with tin foil and, use a baking rack if available, and spread out the whole package of bacon
Bake the eggs and bacon for 20-25 minutes, or until they are cooked through completely
While the eggs and bacon are cooking, cut 8 squares of foil and lay out a bagel on each. Place a piece of cheese on half of each bagel
Once the eggs and bacon are cooked and cooled, cut the egg bake into 8 pieces and place a slice on each bagel. Divide out the bacon onto the bagel for each sandwich
When everything is completely cooled, put both sides of the bagel sandwich together and wrap tightly in foil. Store in the freezer
For reheating
Thawed: if desired, you may let a sandwich defrost in the refrigerator overnight. Remove the foil and wrap in a moist paper towel and microwave for 2 minutes or until the sandwich is heated thoroughly
Frozen: remove the foil and wrap in a moist paper towel. Microwave on 5 power for 2 minutes and then an additional 1-2 minutes on full power or until the sandwich is heated thoroughly
Store these easy prep breakfast sandwiches in a gallon ziplock bag to prevent freezer burn while in the freezer. To reheat, simply remove the foil and wrap in a wet paper towel that has been wrung out. Follow the directions above regarding reheating times.
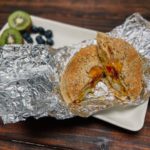
I’ve been really curious about making my own freezer breakfasts, and finally decided to go ahead and try them. Move over breakfast sandwiches, these southwest breakfast burritos are coming in hot.
These burritos take less than an hour to make up, and you have breakfast made up for daaaays afterwards. The best part about making these up, is that you can throw in whatever you’ve got at home. Just as easily, leave out anything you might not enjoy in there either. For a vegetarian option, simply don’t add any breakfast sausage.
These southwest breakfast burritos are meant to be kept frozen. When you’re ready to enjoy one, either leave it in the fridge overnight to defrost, or pull it out right when you’re ready for it. Either way, remove the foil and wrap it in a paper towel that you’ve gotten wet and wrung out- this helps it not get dried out when you reheat it.
tin foil – enough to wrap each burrito (12 total) individually
Ingredients
1 dozeneggs
1/2 bell pepperdiced, any color works
1/2 oniondiced
1 cshredded cheese of choicecheddar, Mexican, or colby jack all work
1/2cblack beans
8ozcan of tomato and green chilis
salt and pepper
2 tsppaprika
2 tsp garlic powder
1lbchorizo or breakfast sausage of choice
12large tortillasat room temperature
Instructions
Cook the breakfast sausage completely, according to packaging directions. Drain excess fat once cooked
In a large bowl, crack the eggs and whisk to combine completely. Add in chopped onion and pepper, black beans, tomatoes, salt, pepper, and garlic
In a large pot, scramble the egg mixture on low to medium heat, until the eggs are about halfway cooked. Add in cheese and cooked meat and continue to cook eggs all the way through
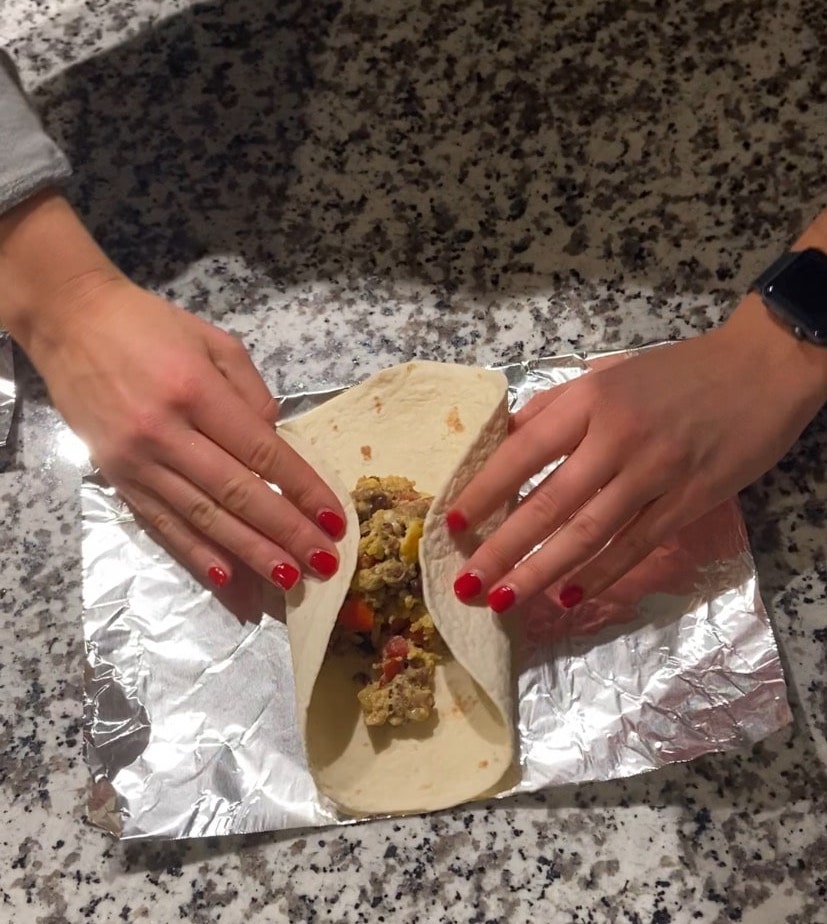
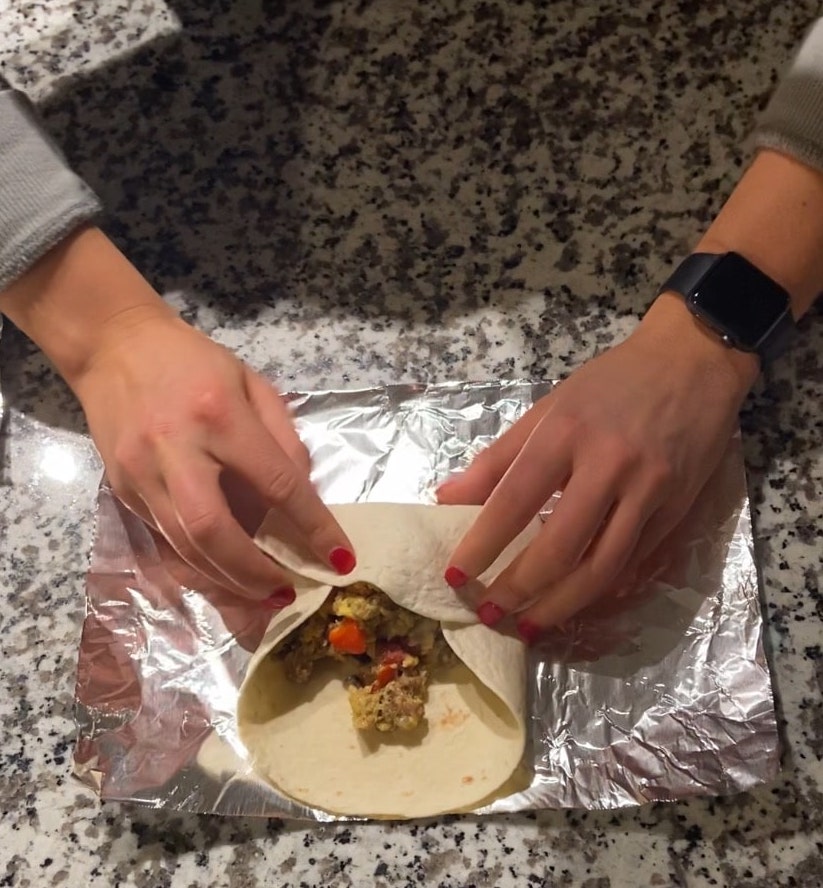
Lay out each tortilla on a square of tin foil
Divide egg mixture into the middle of each tortilla, being careful to not overfill. Allow to cool completely
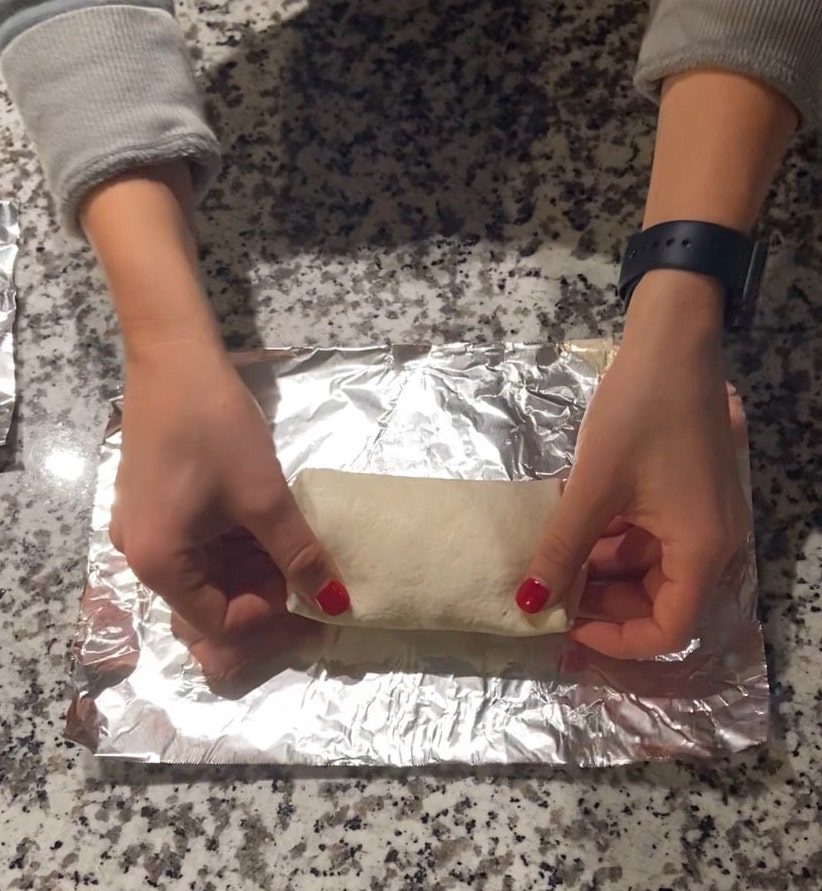
Wrap tortillas into burritos, and wrap the foil around each burrito. Store in a ziplock bag in the freezer for up to 4 months
To Reheat
Thawed: You may remove the burrito from the freezer and allow to defrost in the refrigerator overnight. Wrap a moist paper towel around the burrito, after removing the tin foil, and heat for 1-2 minutes or until the burrito is heated evenly
Frozen: wrap a moist paper towel around the burrito, after removing the tin foil, and heat for 2 minutes on 5 power and then for another 1- 2 minutes at full power, or until the burrito is heated evenly
There is definitely a way to get these bad boys to hold their burrito shape. Fold each tortilla with two opposite sides toward each other, the third side over the fold, and then roll it over itself.
I have been scheming a way to create the best, most delicious, ultimate breakfast pizza- and I think we found a winner. Combined from different breakfast flatbreads I’ve had and ideas in the depths of my brain, I’ve concocted the winning recipe I believe. This heavenly breakfast is topped with rich homemade breakfast gravy, pillowy egg, crispy bacon, caramelized bacon, cheddar cheese, jalapeño, and red peppers, with a spicy sriracha drizzle to top it off. WOW.
I will warn you, this breakfast pizza is a bit time intensive and will not be able to be thrown together in half an hour if you make it all from scratch, but boy is it worth it. With that said, if you buy a flatbread, you will save a lot of time on this process. However, I am always a fan of homemade 🙂 I used the flatbread recipe from Sally’s Baking Addiction and it was easy and delicious.
Ingredients:
2 ½ tbsp butter
2 tbsp flour
1 ¼ C milk (the higher the fat the creamier the gravy will be, I used 2%)
1 ½ tbsp black pepper
½ jalapeño, chopped
1 small onion, sliced thinly*
4 eggs
½ red bell pepper, chopped
½ C shredded cheddar cheese (I prefer to buy a bock and shred it myself- it’s much better that way)
4-6 slices of bacon, cooked to preference
*if you do not want to take the time to caramelize the onions, using a thinly sliced red onion is a very easy substitute- just add it on raw before popping the pizza into the oven
Makes 2 small flatbreads
I started by first making the flatbread and letting the dough rest while I prepared the rest of the toppings. If using a premade flatbread, start at step 2. Preheat oven to 475
In a small skillet, add 2 tbsp butter and let it melt on medium heat. Sprinkle 2 tbsp flour on top and stir until the resulting paste is browned. Add ¼ c of milk and black pepper, stirring constantly to prevent milk from burning and curdling. Once that has thickened, add another ¼ C of milk and repeat the process, until you’ve used 1 C of milk. As you add more you can stir a little less frequently, but be sure to check it every few minutes because the milk can burn quickly. By the time you’re done you should be able to drag the spoon through the gravy and see a line that holds for a few seconds on the bottom of the pot. It will thicken more as it sets.
If using red onions- skip this step. While watching the gravy, in a skillet add ½ tbsp butter and the sliced onion. On a low to medium heat, leave the onions to simmer with a lid on if you have one. Stir every few minutes or so, as these take about 15-20 minutes to caramelize.
Cook the bacon according to the package. I find it easiest to microwave the slices between paper towels for 4-5 minutes, depending on the amount and thickness. I cooked mine til they were crispy
Once the onions are done, add eggs and remaining ¼ c of milk to the skillet and scramble the eggs to a wet consistency. They will cook more in the oven and if you cook them til they are dry they will be dried out and rubbery when they come out of the oven.
Once your flatbreads are prepared, divide the gravy and create a base for your ultimate breakfast pizza. Then layer eggs, cheese, onions, jalapeño, bacon, and red peppers. Bake at 475 for 15 minutes.
Welcome, I’m Libby!
I love to eat GOOD food, and want to help others realize they can make balanced and delicious meals themselves too. From breakfast to dessert, and everything in between, let’s make something delicious together!